 hfiref0x
9.2 KiB
Installation guide (for signed loader and driver)
Step by step guide for VirtualBox x64 Hardened (5.1.16+) VM detection mitigation configuring.
Contents:
- Installing VirtualBox
- Creating VM with required settings
- Using batch script to apply fake VM system information
- Loading monitoring driver for load-in-memory VM dll patch
- Warning: VirtualBox Additions
- Appendix A: Managing monitoring driver
- Appendix B: Using EFI VM
- Appendix C: Uninstalling VirtualBox loader
- Appendix D: Updating VirtualBox
Step 1. Installing VirtualBox
- Download VirtualBox from official site (https://www.virtualbox.org/wiki/Downloads).
- Do clean installation of latest VirtualBox.
- Clean mean - you must firstly uninstall any other versions of VirtualBox and reboot Windows to complete uninstallation. This ensures that no old VirtualBox files will left in system memory and on disk. Unfortunately VirtualBox setup sometimes can't do complete removal without reboot, so do reboot after uninstall.
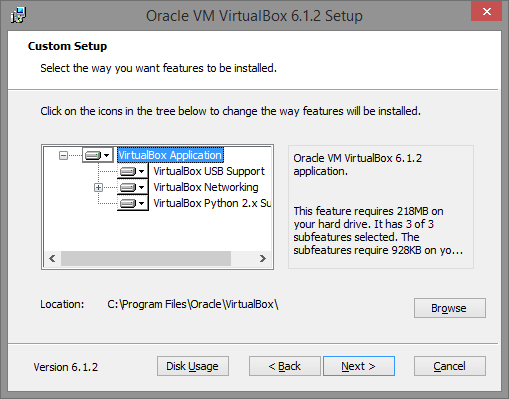
- Start installation and select VirtualBox components to install as shown on fugure below.
Step 2. Creating VM with required setting
In this example we are installing and configuring VirtualBox on x64 notebook with 6Gb of RAM and 4x Intel Core i7 Haswell CPU running full patch Windows 8.1.
Create a new virtual machine (in this example it will be named "vm0") and configure it in the following way:
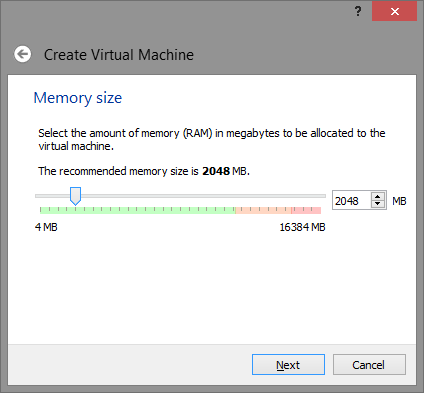
Note: 512 Mb is not requirement, you can adjust or lower this value as you want, but keep in mind - some lame malware attempt to detect VM by available physical memory size, and if its too low - use it as VM detection flag.
Setup Virtual disk
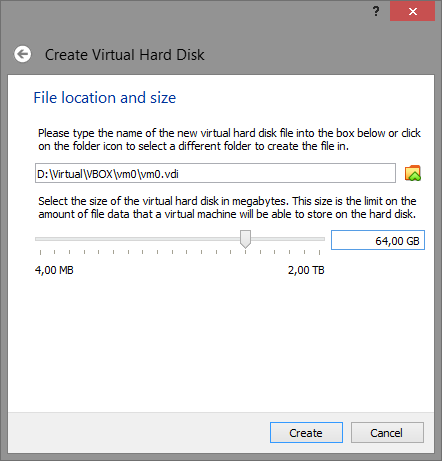
Note: 64 Gb is not requirement however yet again some lame malware attempt to detect VM by hard disk size, so give it reasonable size.
After VM (vm0 is our case) created, open it setting and do some changes.
System
On "Motherboard" tab ensure Enable I/O API is turned on. If you plan to use EFI please read Appendix B: Using EFI VM.
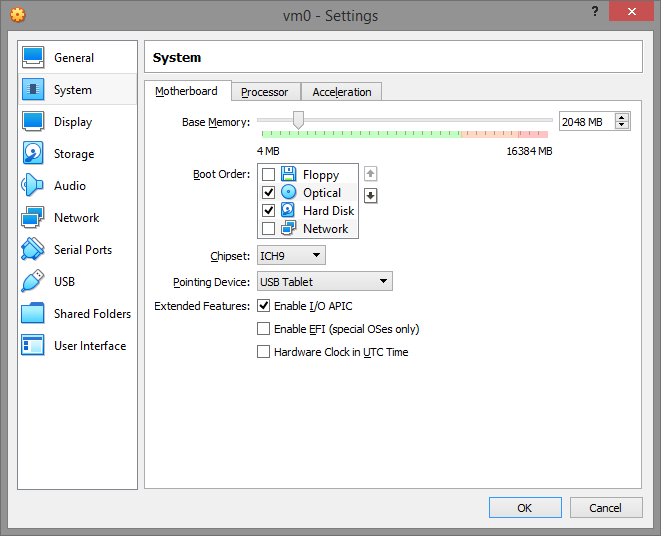
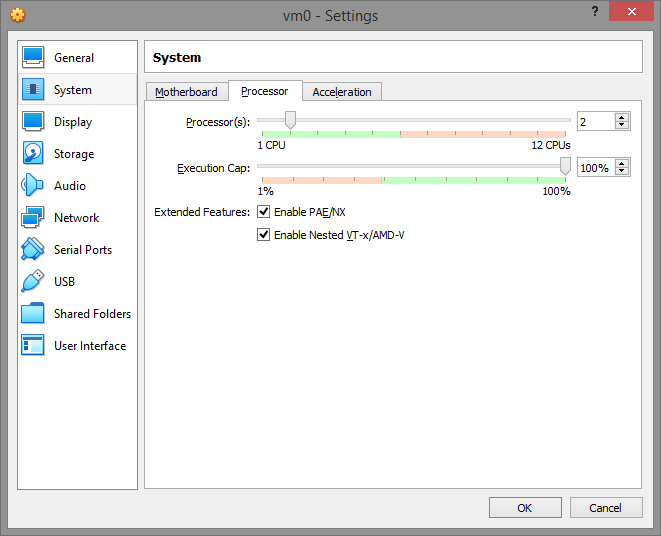
On "Processor" tab ensure PAE/NX enabled. Also note that your VM must have at least TWO CPUs because again number of processors used by malware to determinate VM execution. So give VM at minimum two processors.
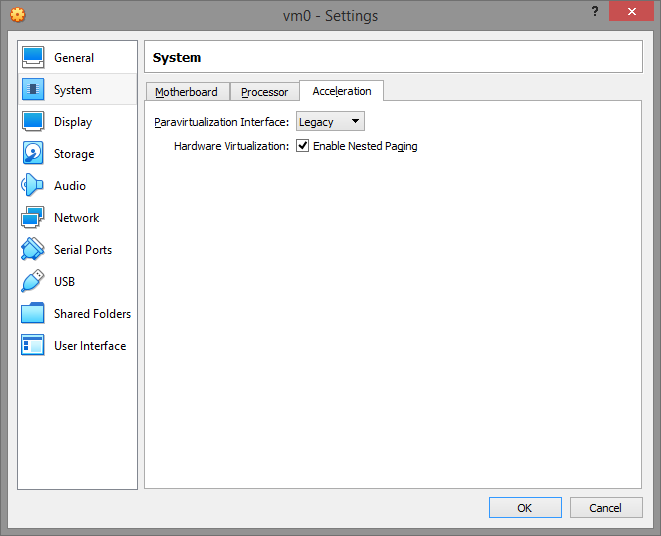
On "Acceleration" tab set Paravirtualization Interface to "Legacy" and enable VT-x/Nested Paging. The "Default" paravirtualization interface give VM ability to detect VirtualBox hypervisor by "hypervisor present bit" and hypervisor name via cpuid instruction. Switching paravirtualization interface to "Legacy" effectively turns off these malware vm-detect friendly features.
Display
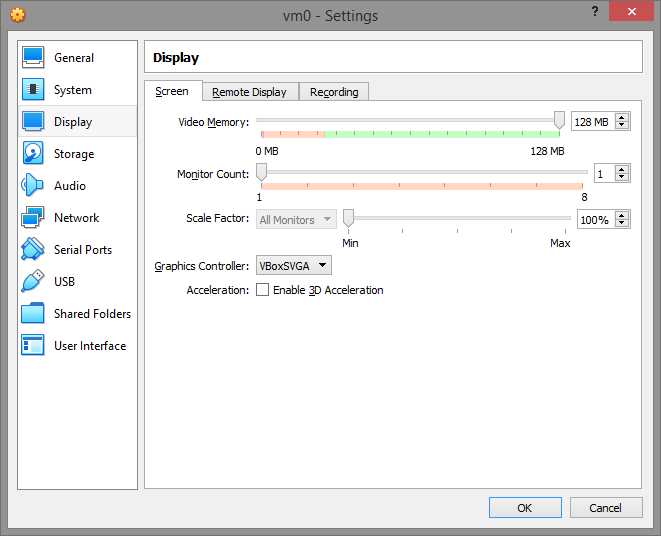
On "Screen" tab disable 3D/2D Acceleration.
Storage
Storage configuration would be looking like that
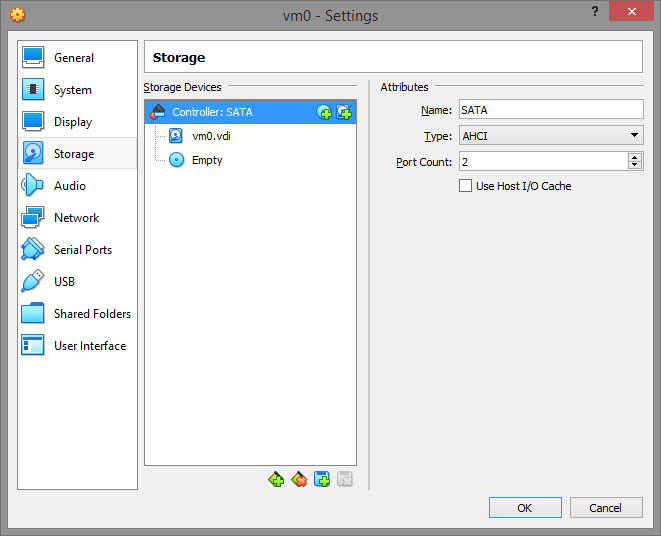
You can use IDE controller instead of SATA, but we will be assuming that you use default SATA next.
Network
Enable NAT for virtual machine, so you can use FTP like programs to communicate with it and machine will have access to internet (if you have it).
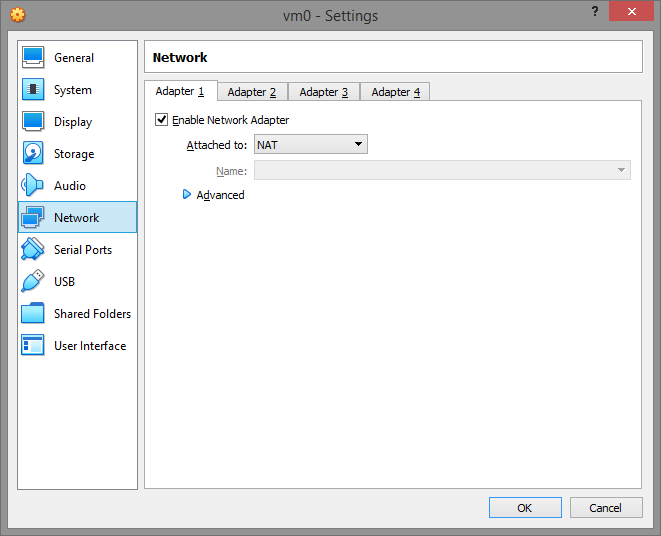
Once all settings set, press OK button.
Step 3. Using batch script to apply fake VM system information
Close VirtualBox.
Save https://github.com/hfiref0x/VBoxHardenedLoader/tree/master/Binary folder to your PC, for example we will save it as C:\VBoxLdr and use this directory next in examples. Open command line prompt (Win+R, type cmd, press Enter). Change current directory to VBoxLdr\data directory (type cd C:\VBoxLdr\data, press Enter)
Now important part. Select script to work with it next depending on your VM configuration.
hidevm_ahci is for VM with SATA/AHCI controller and classical BIOS
hidevm_ide is for VM with IDE controller and classical BIOS
hidevm_efiahci is for VM with SATA/AHCI controller and EFI
hidevm_efiide is for VM with IDE controller and EFI
If you plan to use EFI VM see "Appendix B: Using EFI VM" before doing any further steps.
In our example we created VM without EFI support and with SATA/AHCI controller so we will use hidevm_ahci script. Open it with notepad and change the following lines:
set vboxman="C:\Program Files\Oracle\VirtualBox\vboxmanage.exe"
set vmscfgdir=D:\Virtual\VBOX\Settings\
Here you see two variables used as filepaths below in script, change them to actual locations.
Depending on where your VirtualBox installed place correct path to vboxmanage.exe in vboxman variable. Depending on where you saved Binary folder change it for vmscfgdir variable.
In our example we will leave vboxman as is, because we didn't changed VirtualBox installation path and change D:\Virtual\VBOX\Settings\ to C:\VBoxLdr\data so both lines will look like
set vboxman="C:\Program Files\Oracle\VirtualBox\vboxmanage.exe"
set vmscfgdir=C:\VBoxLdr\data\
Note the backslash at the end of vmscfgdir.
After that save script changes.
Type it in comand line prompt and add your VM name as parameter, e.g. in our case:
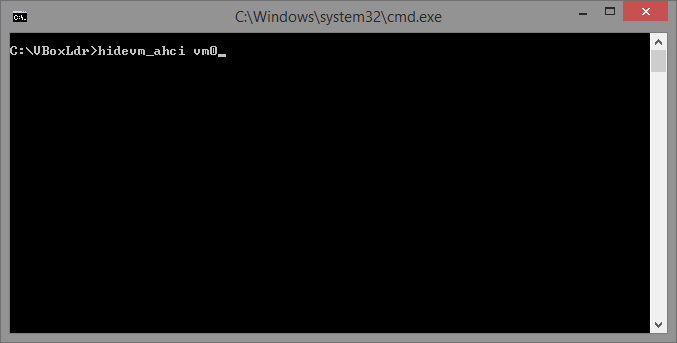
Run it by pressing Enter. This will setup additional configuration for your VM.
Do not run any VM, as it is not ready yet.
Step 4. Loading monitoring driver for load-in-memory VM dll patch
Close VirtualBox if it opened.
Open elevated command line prompt. Run cmd.exe as admin and switch current directory to C:\VBoxLdr (or where you saved Binary folder).
RED ALERT
Both driver and loader MUST be signed with valid certificate allowing loading code to kernel mode. Note that signed version of monitoring driver is INCOMPATIBLE with TDL and attempt to load such driver using TDL will result in BSOD. Signed loader MUST operate with signed driver and unsigned loader MUST operate with unsigned driver.
Run loader.exe without parameters to load monitoring driver and configure it.

Note: that on screenshot use different directory other than in our guide. Upon successful execution you will see here your directory name of course.
Done, monitoring driver loaded and configured. Monitoring driver registerd in system as kernel mode service so it can be managed by standard Windows commands like "net" or "sc", for more information see "Appendix A: Managing monitoring driver"
Warning: VirtualBox Additions
Do not install VirtualBox Additions! This will ruin everything and there is NO workaround for this.
Appendix A: Managing monitoring driver
List of available loader command on screenshot below:

Loader provide command to stop monitoring without unloading monitoring driver. To do this run loader elevated with /s switch. E.g. loader.exe /s, re-run loader without parameters to reenable monitoring.
Once first time installed by loader monitoring driver can be managed by "net" command.
Use
net start tsugumi
net stop tsugumi
to start and stop monitoring driver respectively. The "sc" tool will work too.
Appendix B: Using EFI VM
During Step 3.
- Make backup copy of original
VBoxEFI64.fdin VirtualBox directory somewhere; - Replace
VBoxEFI64.fdin VirtualBox directory with it patched version from VBoxLdr\data directory. Select proper version of file and then rename it toVBoxEFI64.fd(e.g. you have installed 5.1.18 then selectVBoxEFI64_5.1.18.fd); - Use hidevm_efiahci (AHCI controller mode) or hidevm_efiide (IDE controller mode) for your EFI VM.
Appendix C: Uninstalling VirtualBox loader
If monitoring driver loaded - reboot Windows. Delete VBoxLdr folder. Open regedit and delete keys
HKEY_LOCAL_MACHINE\SYSTEM\CurrentControlSet\Services\Tsugumi
HKEY_LOCAL_MACHINE\SOFTWARE\Tsugumi
if present.
If you used patched EFI module then restore VBoxEFI64.fd file from backup otherwise VirtualBox will be unable to work with EFI VM's.
Appendix D: Updating VirtualBox
Scenario: you decided update VirtualBox without clean reinstall and rebooting your PC. Will the loader work with new version? Yes it will, but you need re-run loader.exe in elevated command prompt to update patch information for new version of VirtualBox dynamic link library VBoxDD.dll. Close VirtualBox if it opened. Open command line prompt elevated, change current directory to VBoxLdr and run loader.exe from it.